Blog

Christmas Holiday Blog Hop

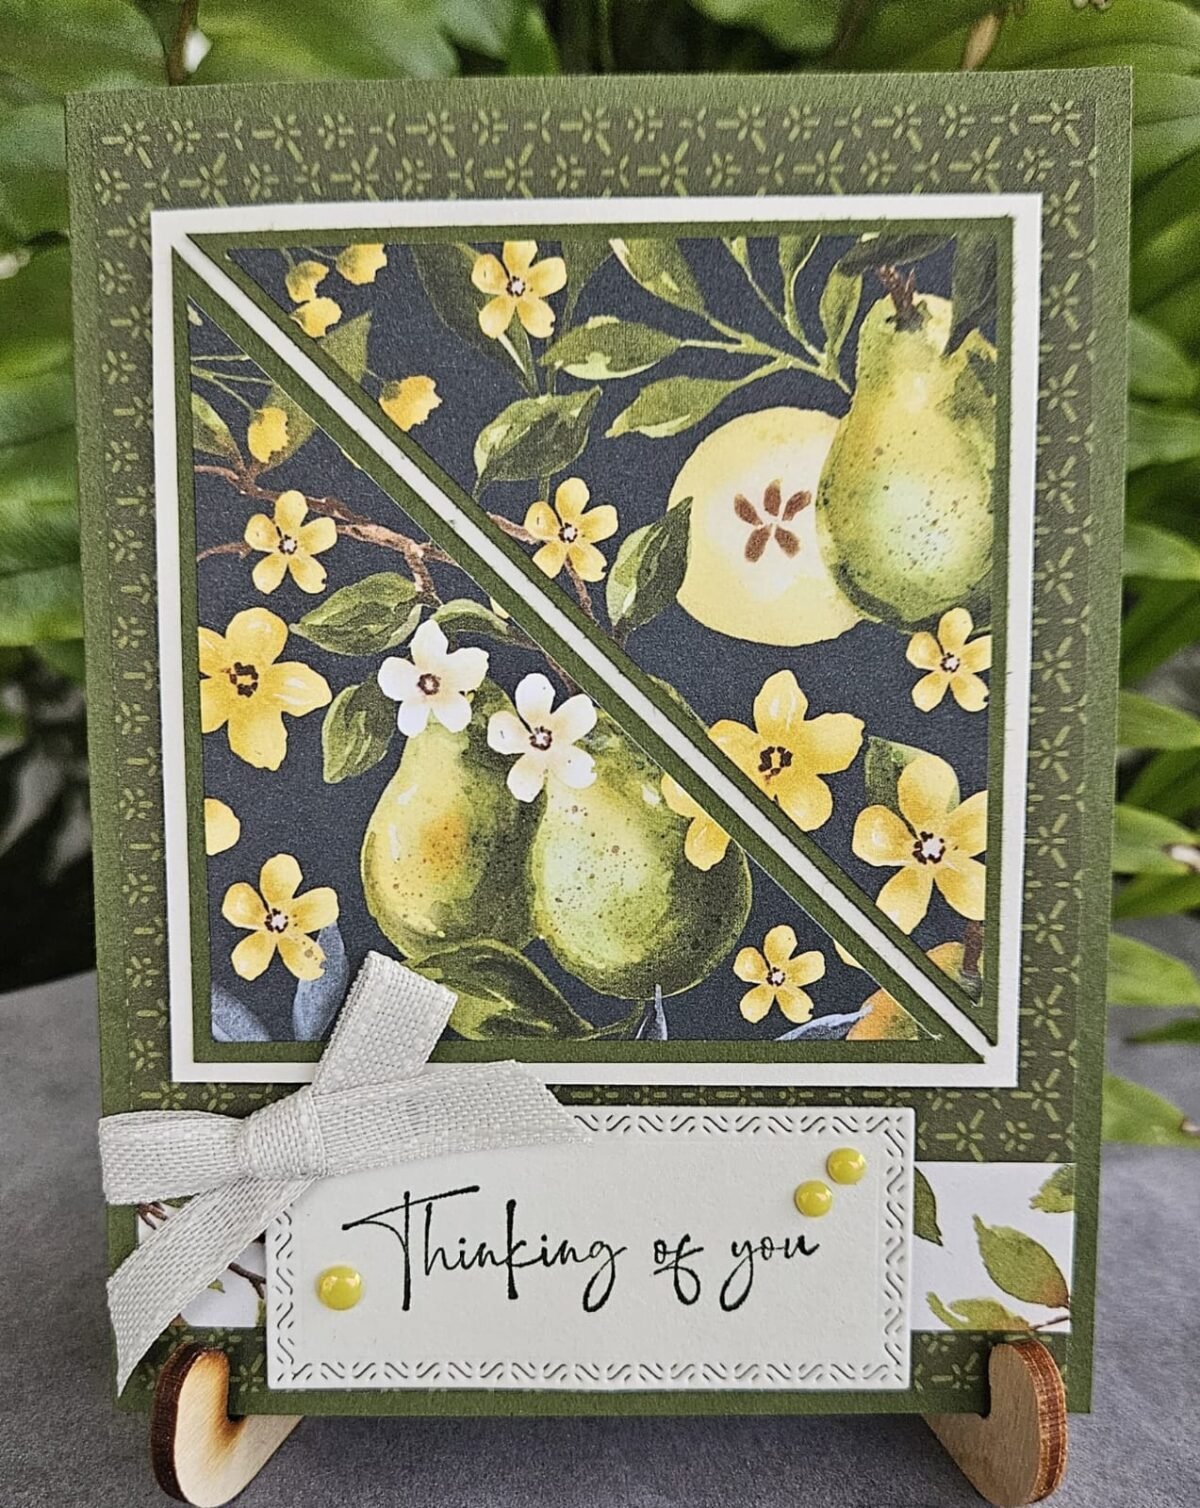
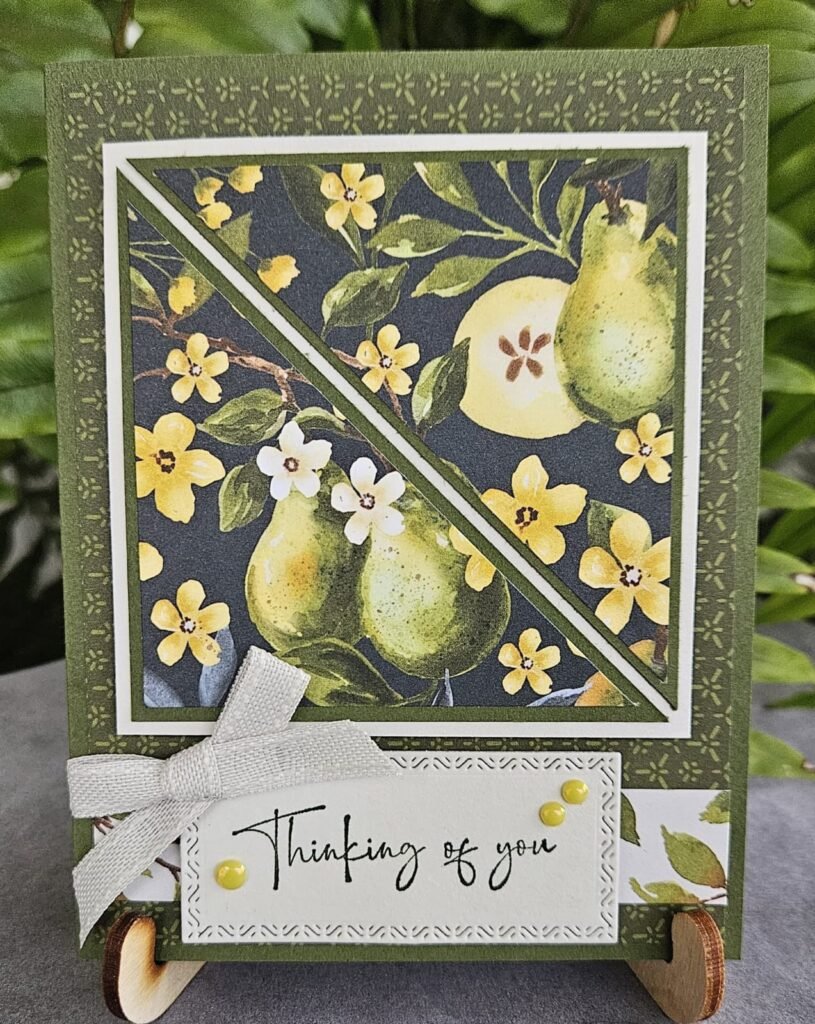
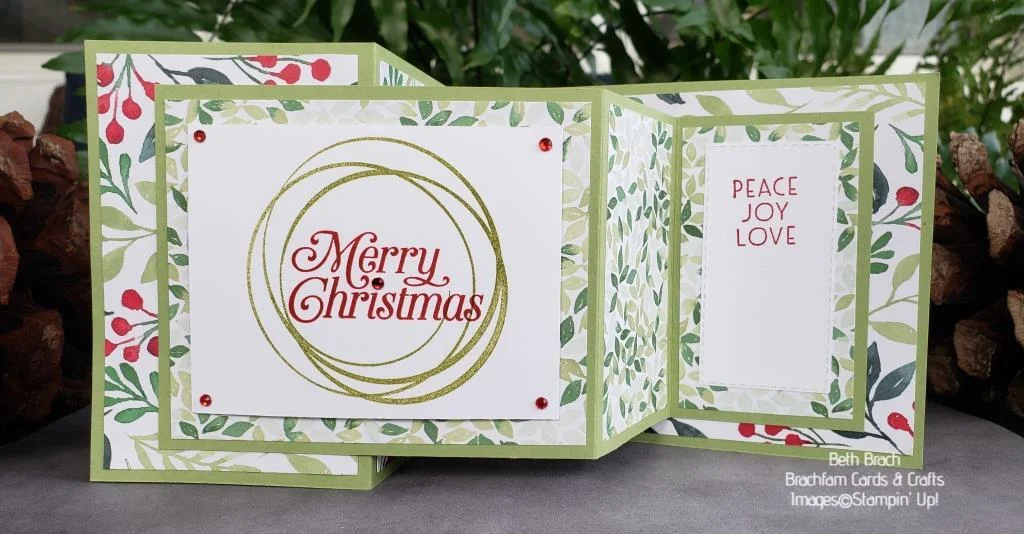
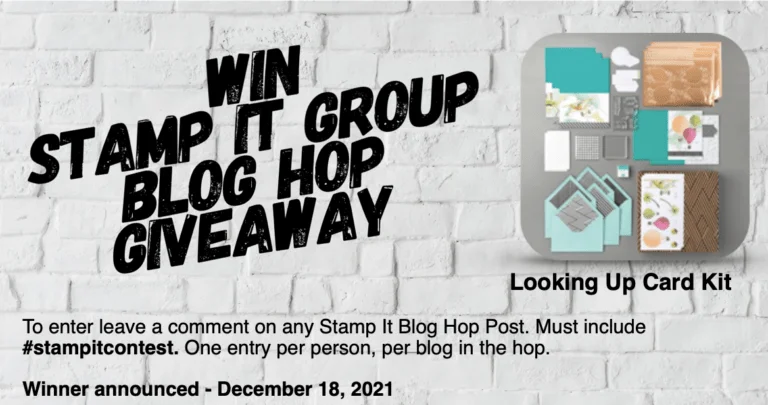
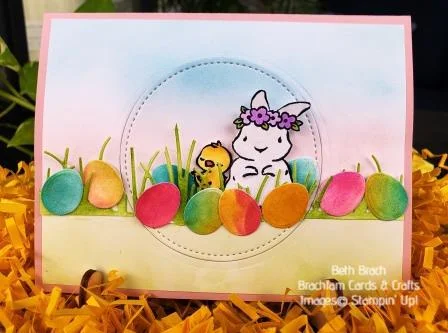
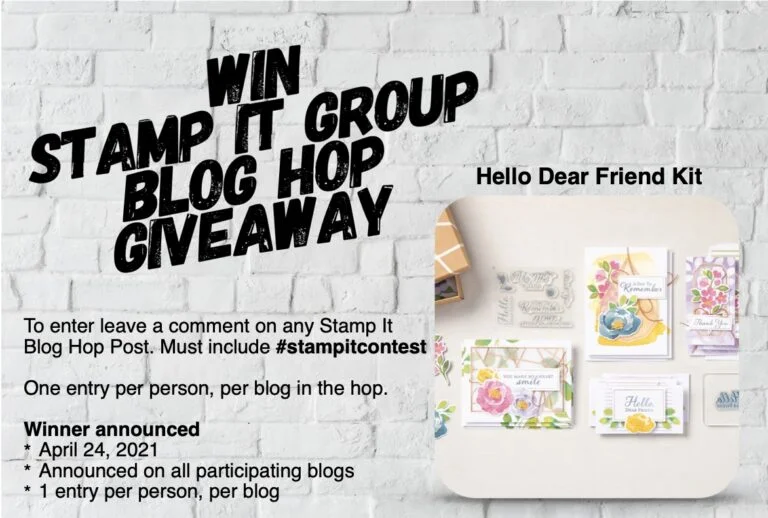
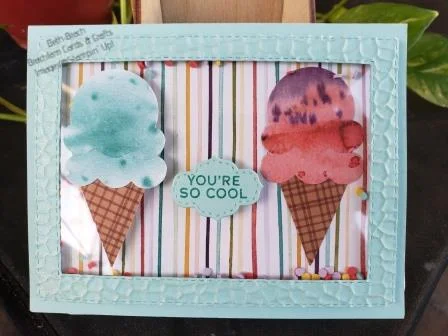
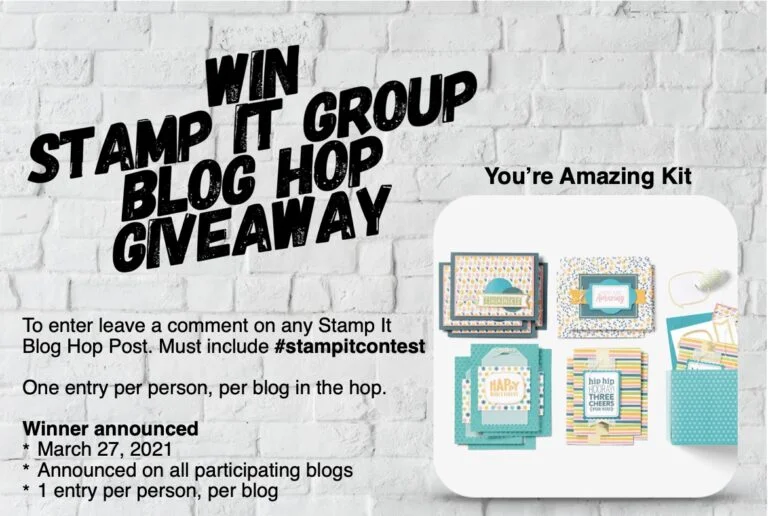
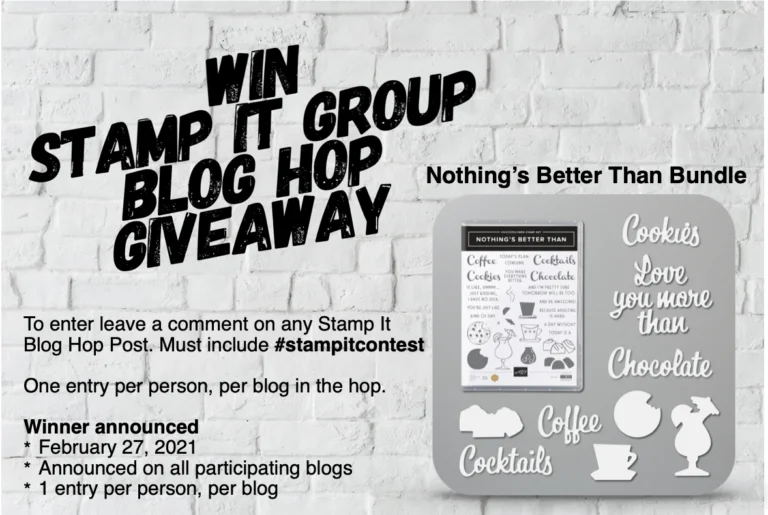
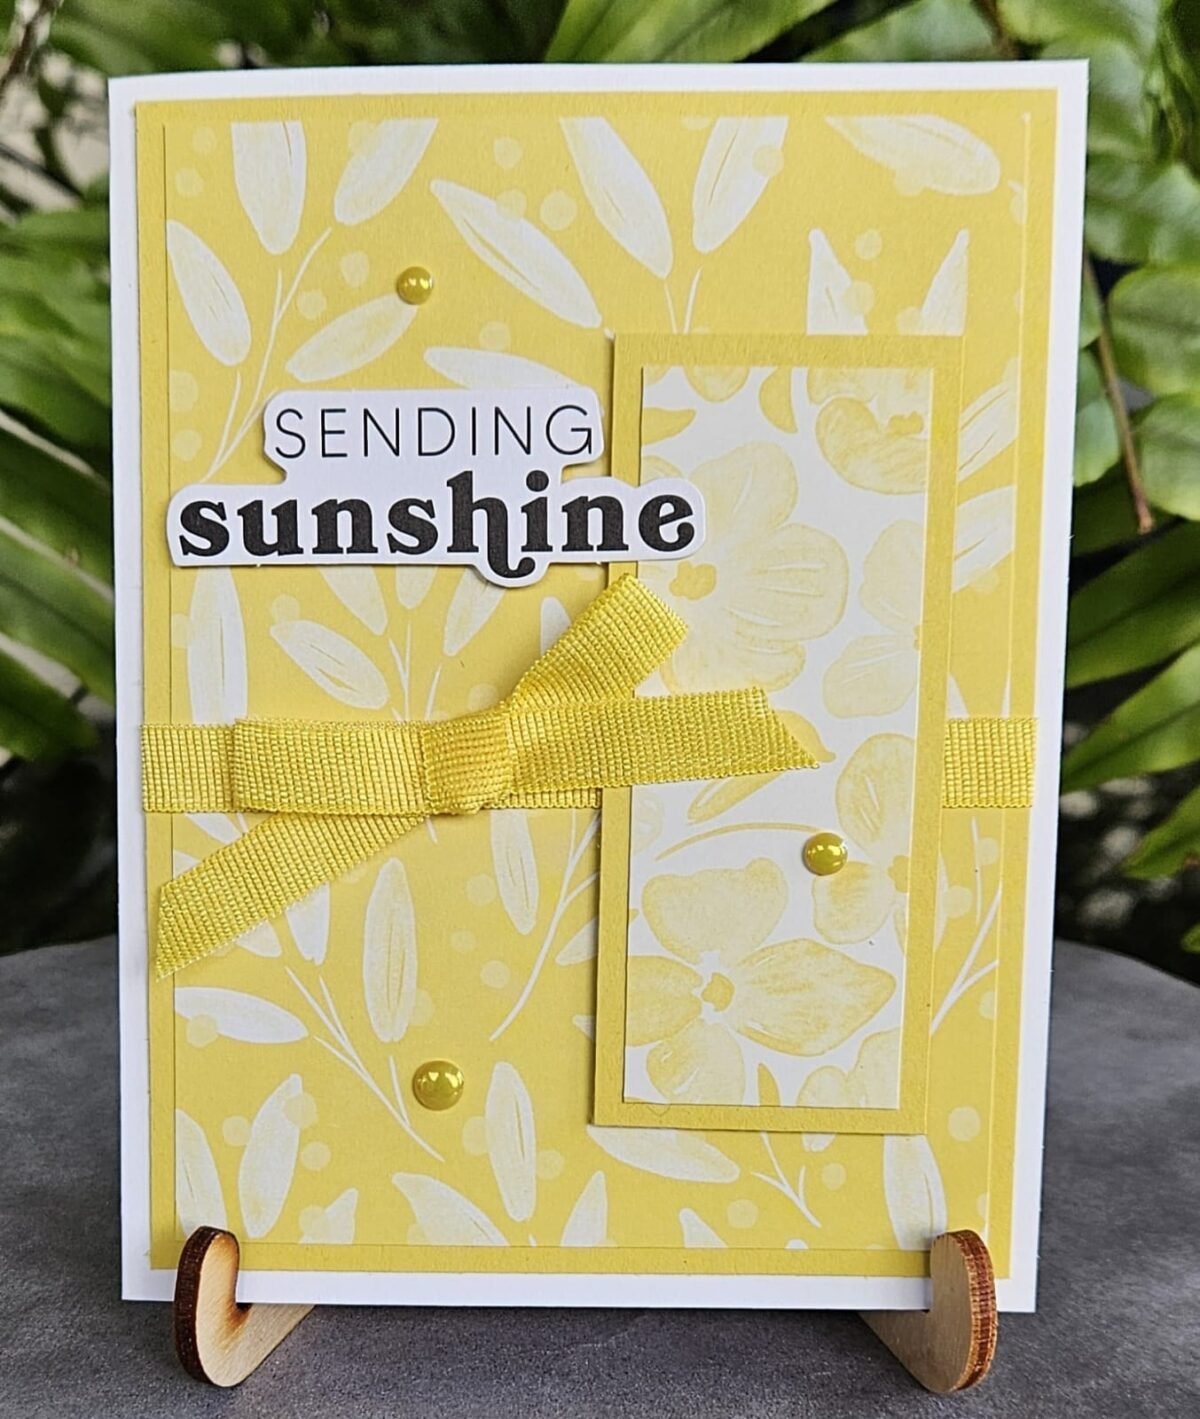
Welcome to the Stamp It Group Christmas Holiday Blog Hop! My name is Beth Brach and I can’t wait to show you my project. Some of you know I love fun folds so today I have a Double Z Christmas Card featuring the Painted Christmas Designer Series Paper from Stampin’ Up! To continue on your journey through our projects, simply use the BLOG HOPPERS links below.  Leave a comment on each blog, including this one, with the hashtag #stampitcontest to be entered to win the Looking Up Card Kit.

This card looks complicated but goes together very easily. 
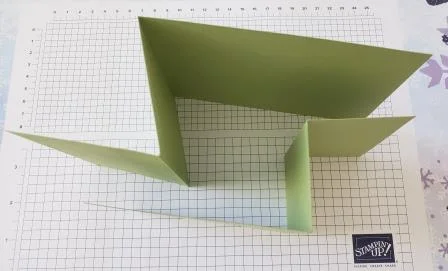
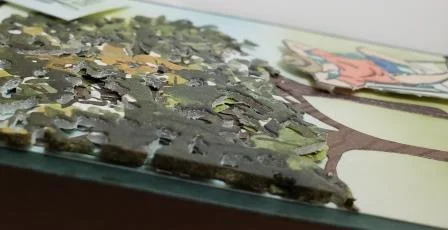
Start by cutting 2 pieces of cardstock 1 at 4 ¼” x 11” scored at 2 ¾” & 5 ½” and the other at 3 ½” x 8 ½” scored at 2 1/8” x 4 ¼”. Fold each piece of cardstock along the score lines.

Double Z cardstock folded along score lines before the application of DSP.

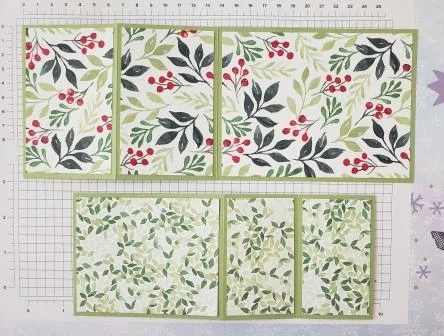
Then pick a 2 coordinating Designer Series papers. Cut the first pattern: 1 piece at 4” x 5 ¼” and 2 pieces at 2 ½” x 4”. Adhere to the large piece of cardstock. Cut the second pattern: 1 piece at 3 ¼” x 4” and 2 at 1 7/8” x 3 ¼”. Adhere these to the smaller piece of cardstock.

Designer Series Paper layout

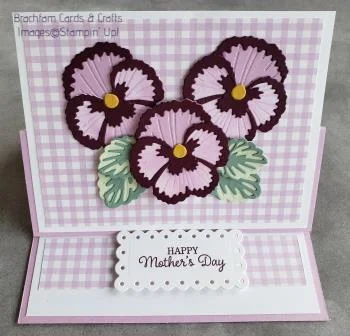
Fold cardstock along score lines. Adhere the smaller piece of cardstock on top of the larger piece. Tip: Apply adhesive to the right side of the smaller layer and position it on the right side of the larger layer. Apply adhesive to the left side of the small layer then fold card together.

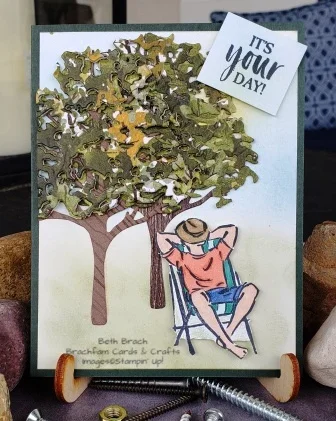
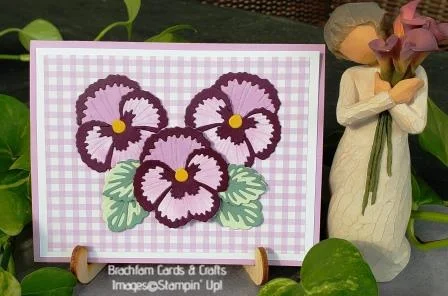
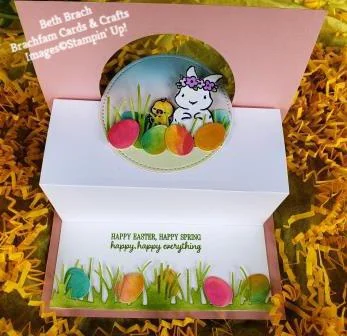
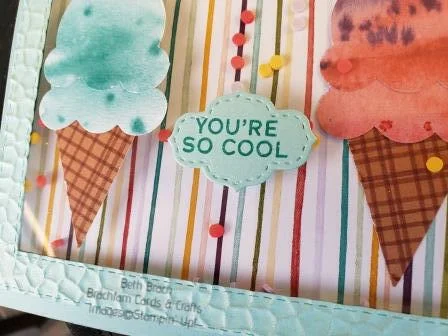
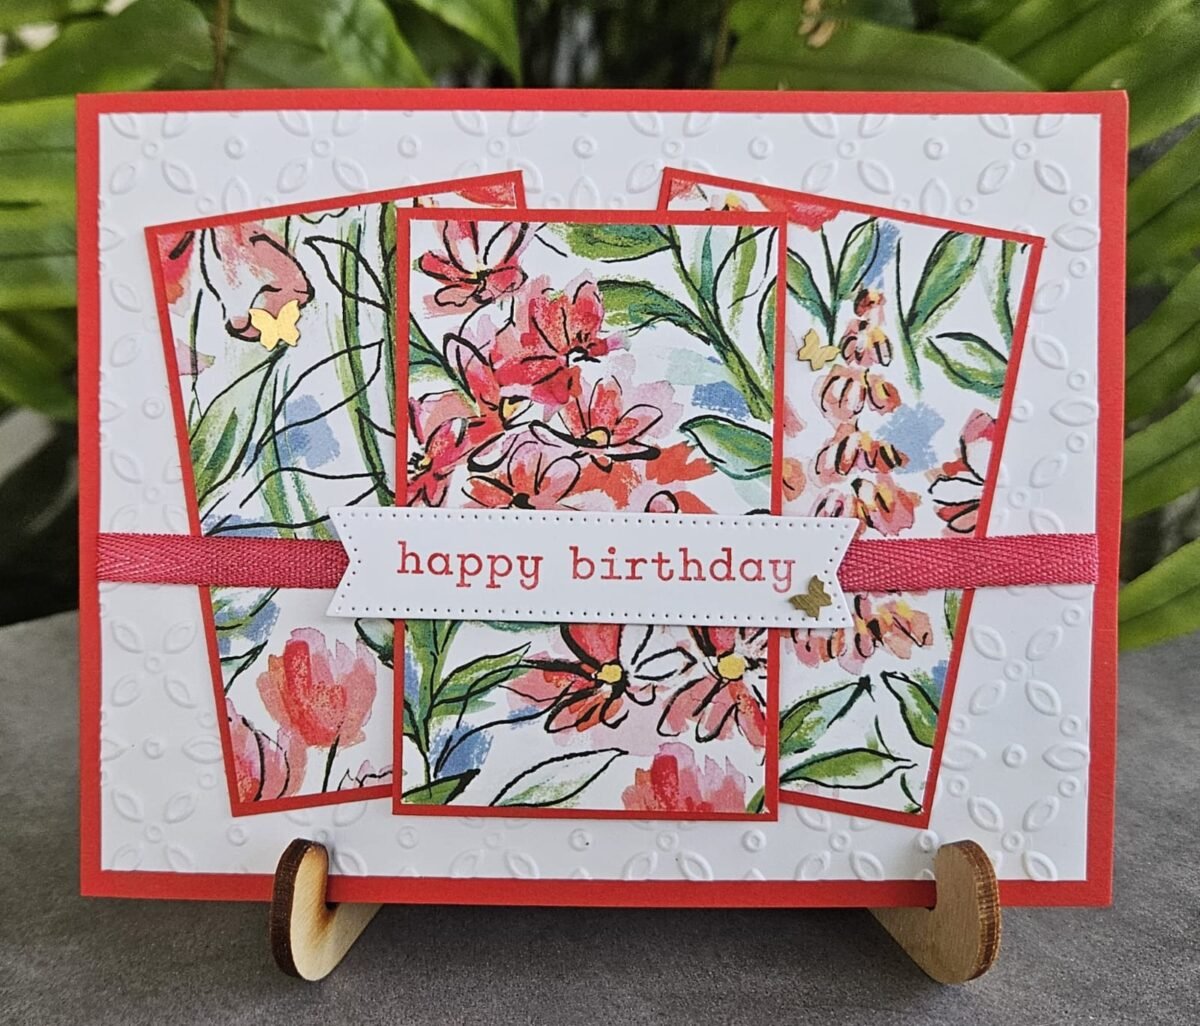
Stamp sentiment for card front on a piece of Basic White 3 1/2″ x 3 3/4″. Use the Stitched Rectangle Dies to cut a small Basic White panel for the inside and stamp sentiment. Use dimensionals to adhere the font sentiment panel. Adhere small die cut rectangle with liquid glue or your choice of adhesive.

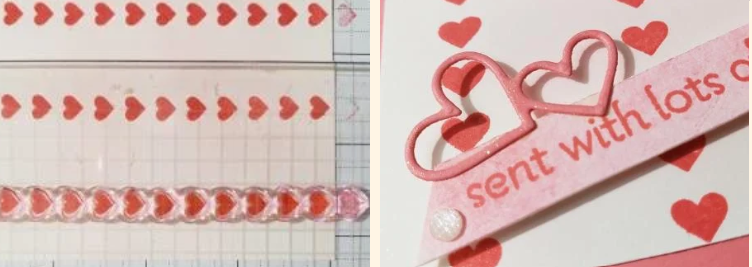
Embellish front sentiment panel with Red Rhinestone Basic Jewels. And there you have it, a beautiful Christmas card sure to delight your friends and family.

Remember to leave a comment with #stampitcontest to enter the drawing. Check out last month’s winner! Kathy Oertle -you left a comment last month and look what you won!!

Want to be a winner like Kathy? Just leave a comment with #stampitcontest below.

Here are the links to the rest of the BLOG HOP. Enjoy your journey!

Product List

Thanksgiving Theme Blog Hop

Welcome to the Thanksgiving Blog Hop! I’m Beth Brach and even here in Florida fall is in the air. I hung the fall wreath on my door earlier this week and it inspired me to make this card to celebrate the season. To continue on your journey through our projects, simply use the BLOG HOPPERS links below.  Leave a comment on each blog, including this one, with the hashtag #stampitcontest to be entered to win the Hello Dear Friend kit.

This card is meant to replicate my front door with a little bit of artistic license. The Cork Paper ‘door’ is framed by Early Expresso cardstock – both cut using the Stitched Rectangle Dies. Score the left side of the Early Expresso doorframe and attach it to the card base with Tear Tape so the door can be opened. A gold foil wreath used as a base, and the accent leaves were cut with the Seasonal Swirl Dies. The leaves are from the Detailed Pumpkin Dies. Top off with a pretty gold bow and add a door knob using a Matte Black Dot.

When you open the door, some cute pumpkins are there to say welcome. Use a small piece of Velcro to stop the door from flapping open. The easel fold makes it easy to display and adds a little extra wow!

Don’t forget to leave a comment on each blog, including this one, with the hashtag #stampitcontest to be entered to win!

Congratulations to last months Blog Hop Winner!

Product List

Father’s Day Blog Hop

Man relaxing under some trees for Father's Day

Hello and welcome to the Father’s Day Blog Hop. My name is Beth Brach. It’s time to celebrate father’s everywhere! They work hard but once in a while need to sneak in a well-deserved nap. What a better place than outside under the trees. To continue on your journey through our projects, simply use the BLOG HOPPERS links below.  Leave a comment on each blog, including this one, with the hashtag #stampitcontest to be entered to win the Hello Dear Friend kit.

This card features the Beautiful Tree Dies and the A Good Man stamp set from Stampin’ Up! Each tree has two layers of leaves. The bottom layer is all green tones while the top layer is multi colored. One of the top layers was cut on paper adhered to an Adhesive Sheet. Gives the tree a 3 dimensional look. Stampin Blends can be used to color the white edges of the adhesive sheet if desired. I colored the left edge where leaves met the Evening Evergreen cardstock.

The background was made using Blending Brushes. The grass is a combo of Mossy Meadow and Old Olive. The sky is Balmy Blue with a hint of Bumblebee to add a touch of sunshine. The sleeping dad was stamped and colored with Stampin’ Blends then fussy cut.

Hope you enjoy your journey through our Father’s Day Blog Hop. Don’t forget to leave a comment with #stampitcontest to have your name entered in the drawing.

Check out last month’s winner! Marla Lesniak -you left a comment last month and look what you won!!

Want to be a winner like Marla? Just leave a comment with #stampitcontest below.

Here are the products used to make this special card celebrating fathers everywhere.

Product List

Mother’s Day Blog Hop

Hi I’m Beth Brach. Welcome to our Mother’s Day Blog Hop. The easel fold Mother’s Day card I’m sharing with you is dedicated to my role model, my rock and my heart – Mary Ellen Cross – my mother. Mom loves to garden and one of her favorite flowers are pansies. Here’s a sweet card highlighting the Pansy Petals Suite (available May 4th) and one of Stampin’ Up’s! new In Colors, Fresh Freesia.

To continue on your journey through our projects, simply use the BLOG HOPPERS links below.  Leave a comment on each blog, including this one, with the hashtag #stampitcontest to be entered to win the Simply Citrus Kit!

Pansy Easel Card in Fresh Freesia for Mother's Day

The Fresh Freesia gingham sets off the pansies and leaves made using the Pansy Dies. The large upper petal is a layer of Fresh Freesia while the lower petals are colored using a blending blush. All of the petals are outlined with Blackberry Bliss and have been dabbled with Wink of Stella. The leaves were built using Soft Sea Foam as the base accented with Soft Succulent. And just like live pansies, the center is highlight with a pop of color, in this case Bumblebee. The dies make building a beautiful pansy a breeze.

Pansy Easel Card in Fresh Freesia for Mother's Day

The easel fold is one of my favorites and helps to perfectly display the pansies. The sentiment label is one of the new Scalloped Contour Dies (available May 4th) – quickly becoming one of my go to set of dies!

Don’t forget to check out the other fabulous projects in our Mother’s Day Blog Hop and remember to leave a comment with #stampitcontest.

Product List

Easter Blog Hop!

Spring is here, the days are getting warmer and flowers are blooming – it must be Easter time! Hi, I’m Beth Brach. Thank you for stopping by today to check out my Easter card featuring a sweet bunny and his little chick friend watching over some beautiful Easter eggs. To continue on your journey through our projects, simply use the BLOG HOPPERS links below.  Leave a comment on each blog, including this one, with the hashtag #stampitcontest to be entered to win the Hello Dear Friend Kit.

The background was made using the Blending Brushes with Granny Apple Green, Blushing Bride and Seaside Spray ink. On a scrap of white cardstock I blended various colors (Bermuda Bay, Magenta Madness and Mango Melody) and then die cut the eggs from the Wreath Builder dies. The grass is from the Friendly Silhouettes dies with the cattails cut off and the grass trimmed down a bit. The cute bunny and chick from the Springtime Joy stamp set were colored with Stampin’ Blends and fussy cut. Of course the eggs have a touch of Wink of Stella and the bunny is coated with Shimmery Crystal Effects. Look what happens when you open it up!

Inside of Easter card showing greeting and more eggs

You find the rest of the bunny’s eggs! I am a big fan of fun folds and really like this one. The peek-a-boo circle is cut using the largest circle of the Stitched Shapes circle dies and the sentiment is from the Timeless Tulips stamp set. Thanks to Carol Huber Garrison for posting great instructions for this fold.

Product List

Spring Fling Blog Hop

Hi everyone, I’m Beth Brach. Welcome to the February Spring fling Blog Hop. Can you believe Spring is almost here! Time to get out of the house, enjoy the weather and have fun! Nothing screams fun more than ice cream cones in a cute shaker card! To continue on your journey through our projects, simply use the BLOG HOPPERS links below.  Leave a comment on each blog, including this one, with the hashtag #stampitcontest to be entered to win the Your Amazing Kit. Thanks for stopping by today!

Ice Cream Cones in a shaker card

This shaker card was created using the Sweet Ice Cream Bundle and the beautiful coordinating Designer Series Paper. The Ice Cream Builder Punch made is simple to make gorgeous ice cream cones by punching out the ice cream and the cone shapes right from the DSP – no stamping needed.

The Stitched Rectangle Dies helped me make a perfect frame and the texture was added with the Hammered Metal 3D Embossing folder. Attached a Window Sheet to the frame using Tear Tape. One ice cream cone was mounted on the decorative layer and the other on the outside of the frame directly on the Window Sheet. The Ice Cream Corner Sprinkles are the shaker elements – they are so cute – and then the frame was adhered using Foam Adhesive Strips. The Stitched So Sweetly Dies had the perfect label for this happy card.

Finished off the inside with another delicious looking ice cream cone -this one stamped – and sentiment! Now I’m ready for Ice Cream – how about you!

Product List

Valentine’s Day 2021

Jan Blog Hop Banner

Hi everyone, I’m Beth Brach. Welcome to the January Valentine’s Day Blog Hop. It’s time to celebrate love with a sweet card perfect for that someone special in your life. To continue on your journey through our projects, simply use the BLOG HOPPERS links below.  Leave a comment on each blog, including this one, with the hashtag #stampitcontest to be entered to win the Nothing’s Better Than Bundle.

Flirty Flamingo hearts sending Valentine's Wishes

Hearts galore to celebrate Valentine’s Day! The background paper was made with one of the new Blending Brushes, Flirty Flamingo ink and Shimmer White card stock. It was then stamped with the heart stripes using the hinge method and the Stamparatus (one of my favorite tools!). All the stamped hearts, die cut hearts and the sentiment are from the Lots of Hearts Bundle. A kiss of Wink of Stella on the small open hearts and around the edges of the large hearts plus a couple of Elegant Faceted Gems add just the right touch of bling. A great card to let a loved one know you care.

Thanks for stopping by and checking out my creation. Don’t forget to leave a comment along with the hashtag #stampitcontest to be entered to win the Nothing’s Better Than Bundle.

Jan Blog Raffle
Winner of Dec Blog Hop
< Product List

Winter Blog Hop

Welcome to the December Blog Hop! My name is Beth Brach. I’m excited to share this New Years themed card with you today. It’s a great way to spread some cheer as we ring out 2020 and welcome 2021! To continue on your journey through our projects, simply use the BLOG HOPPERS links below.  Leave a comment on each blog, including this one, with the hashtag #stampitcontest to be entered to win the Simple Citrus Card Kit.

New Years Silver starburst 2021 card

Are you looking forward to 2021? I know I am and here’s a card to help us celebrate. The silver starburst was created using Kylie Bertucci’s Scrappy Strip technique. The Silver and Gold Foil combined with Foam Adhesive Sheets and the Playful Alphabet dies resulted in ‘popped up’ letters that scream Happy New Year. The edges of the label were also heat embossed in silver to add extra detail. Finish it off with a couple of Clear Epoxy Droplets and prepare to celebrate 2021!!

Adhere a 1 1/2″ x 5 1/2″ gold panel embossed with the Dainty Diamonds 3D Embossing Folder to a 4 1’4″ x 5 1/2″ Basic Black panel. Build the star burst using the Scrappy Strips technique, then trim to 4″ x 5 1/4.” Adhere a 1/2″ x 5 1/4″ Gold Foil accent strip across the seam between the gold panel and the silver starburst.

Stamp 2021 with Versamark on Basic Black using the Family Party Stamp Set. Cover with Silver Embossing Powder and set with Heat Tool. Use the Tasteful Labels Dies to cut out the label. Rub the edges across the Versamark stamp pad, sprinkle with Silver Embossing Powder and set with Heat Tool. Attach Silver and Gold Foil to a Foam Adhesive Sheet then cut out letters using the Playful Alphabet Dies.

New Year 2021 silver and gold starburst

Glue the finished panel to a 5 1/2″ x 8 1/2″ Basic Black cardstock that is scored and folded at 4 1/4″. Place a 5 1/4″ x 4 ” Whisper White/ Basic White panel inside stamped with a sentiment of your choice. Add some Clear Epoxy Droplets, break out the champagne and get ready to welcome 2021!!

winner
Product List

Color Crazy Club – October

Magenta Madness was the star of today’s Color Crazy Club meeting. Take a Mini Pizza box, add beautiful paper and some pretty ribbon – before you know it, a cute gift box appears!

Mini pizza gift box in Magenta Madness a Stampin' Up! 2020-2021 In-Color using Whale Done Stampin' Up! stamp set

Take your gift packaging to a new level with this easy project. The box measures 3 1/2″ x 3 1/2″ x 1″ and can be used for gift cards, jewelry, candy, cookies or other small gifts.

This is just one of the projects we made today. Check out the Color Crazy Club page for all the club details.

Here’s the card recipe for this great gift box. All the supplies can be found in my on-line store. Scroll down for a FREE Tutorial with step by steps instructions. Like what you see? Subscribe below and get notifications of future posts.

Color Crazy Club Magenta Madness Gift Box Tutorial

Faith over Fear!

In these crazy times, sending a card of encouragement can make all the difference to someone. Today’s card is the perfect option.

Encouragement greeting card in Misty Moonlight using the phrase let your faith be bigger than you fear using Ridiculously Awesome from Stampin' Up!

This wonderful sentiment is part of the Ridiculously Awesome stamp set by Stampin’ Up! The card features Misty Moonlight, a 2020-2021 In-Color. Don’t you think the warm blue sets just the right tone? A layer of In Good Taste Designer Series Paper gives a textured vibe while the Stitched So Sweetly Dies create an impressive sentiment label that highlights the thought behind the card.

Faith Over Fear Card Recipe

Check out all the great products that Stampin’ Up! has to offer at my online store.

Use today to spread some sunshine! In the meantime………….

Happy Stamping!